 |
|
|
| ◆ | VNCサーバーの準備 |
|
CentOSのインストール時に “X Windows System”・“GNOME Desktop”・“Japanese Support”を選択していない場合は必要なソフトをインストール なお、既に上記ソフトがインストール済の場合は “◆ VNCサーバーのインストール” へ |
|
| X Windows System のインストール | |
|
[root@centos]# yum -y groupinstall "X Window System" |
|
| GNOME Desktop のインストール | |
|
[root@centos]# yum -y groupinstall "GNOME Desktop" |
|
| Japanese Support のインストール | |
|
[root@centos]# yum -y groupinstall "Japanese Support" |
|
| ◆ | VNCサーバーのインストール |
| バージョン:TigerVNC 1.8.0 | |
|
[root@centos]# yum -y install tigervnc-server |
|
| パスワード設定 | |
|
[root@centos]# vncpasswd Password:******** <--- パスワード入力 Verify:******** <--- パスワード再入力 Would you like to enter a view-only password (y/n)? y <--- y を入力 Password:******** <--- パスワード入力 Verify:******** <--- パスワード再入力 |
|
| ◆ | VNCサーバーの設定 |
| 設定ファイルを元ファイルよりコピーして設定する | |
|
[root@centos]# cd /etc/systemd/system <--- ディレクトリの移動 [root@centos system]# cp /usr/lib/systemd/system/vncserver@.service vncserver@:1.service <--- コピー |
|
| 設定ファイルの編集 | |
|
[root@centos system]# vi vncserver@:1.service 途中略 [Unit] Description=Remote desktop service (VNC) After=syslog.target network.target [Service] Type=forking # Clean any existing files in /tmp/.X11-unix environment ExecStartPre=/bin/sh -c '/usr/bin/vncserver -kill %i > /dev/null 2>&1 || :' ExecStart=/usr/sbin/runuser -l <USER> -c "/usr/bin/vncserver %i" <--- 書き換え ↓ ExecStart=/usr/sbin/runuser -l ****** -c "/usr/bin/vncserver %i" (******はゆざー名) PIDFile=/home/<USER>/.vnc/%H%i.pid <--- 書き換え ↓ PIDFile=/home/******/.vnc/%H%i.pid (******はゆざー名) ExecStop=/bin/sh -c '/usr/bin/vncserver -kill %i > /dev/null 2>&1 || :' [Install] WantedBy=multi-user.target |
|
| 元のディレクトリに戻る | |
|
[root@centos]# cd |
|
| ◆ | デーモンのリロード |
|
[root@centos]# systemctl daemon-reload |
|
| ◆ | VNC の自動起動設定 |
|
[root@centos]# systemctl enable vncserver@:1.service |
|
|
[root@centos]# systemctl list-unit-files | grep vncserver@:1.service vncserver@:1.service enabled <--- enabled になっていればOK |
|
| ◆ | VNC の起動 |
| ディスプレイ番号毎に下記を実行 | |
|
[root@centos]# systemctl start vncserver@:1.service |
|
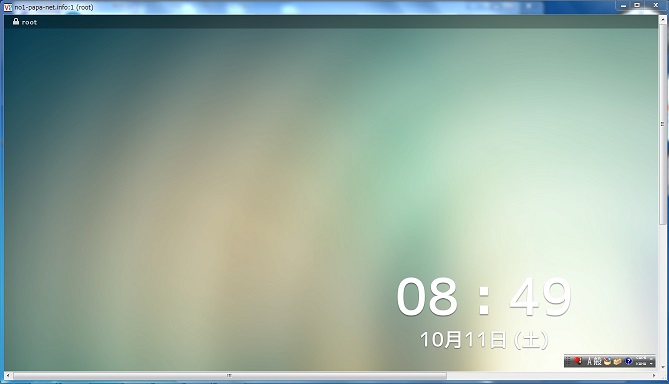
| ◆ | 注意事項 |
| VNC の起動 後ある程度時間が経ってからクライアントからアクセスすると下図のように画面がロックされています | |
|
|
|
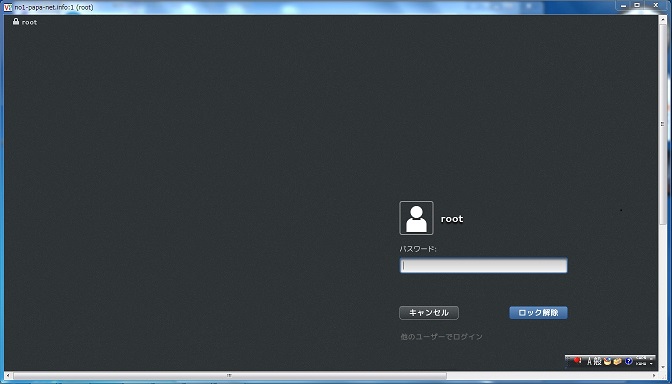
| 『Enter』キーを押すと下図のようにログイン画面に変わるのでパスワードを入力して『Enter』キーを押す | |
|
|
|
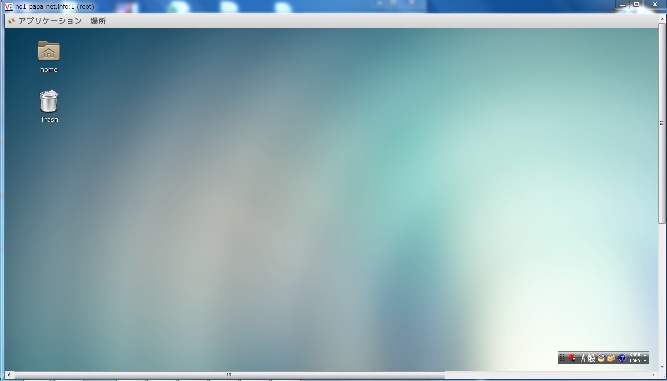
| これで画面ロックが解除されます | |
|
|
|